
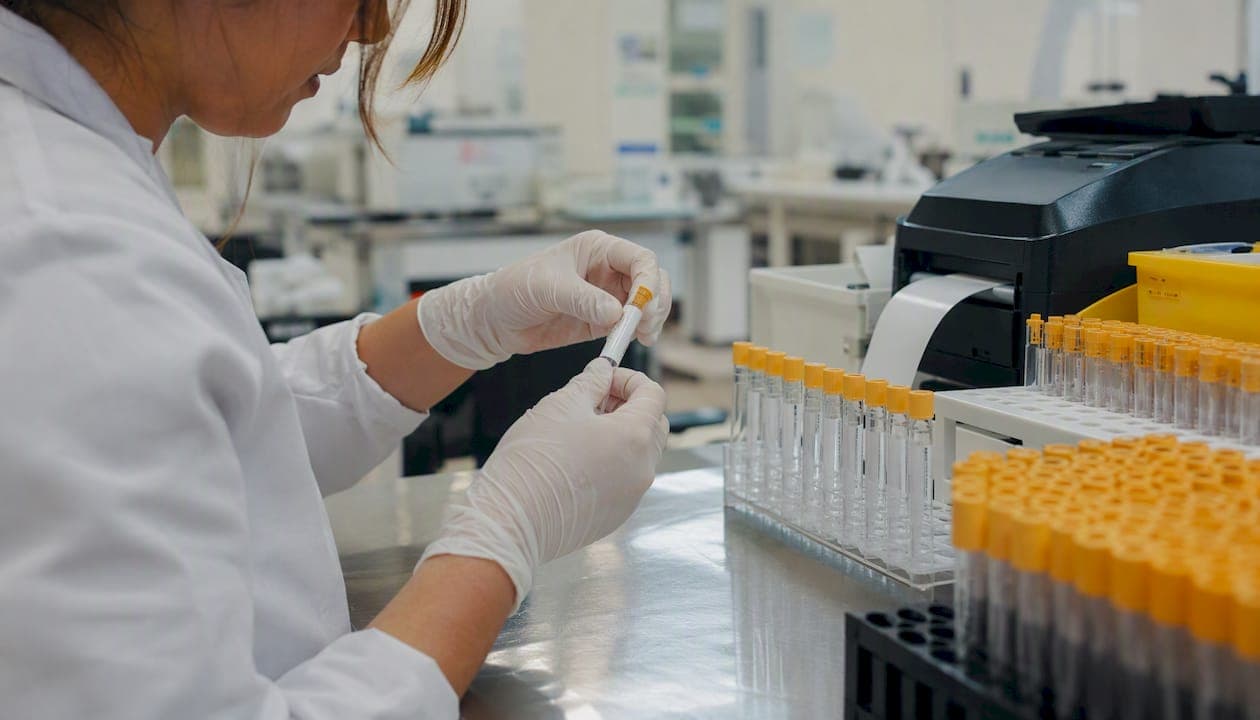
A compliant lab sample label must carry at minimum two patient identifiers (full name plus MRN or date of birth), an accession or sample ID, collection date and time, specimen type or source, and a machine-readable barcode or Data Matrix code for LIMS and EMR integration. Under CLSI PRE01 and institutional policies aligned to CLIA and CAP expectations, a label missing any of these fields, or one that does not exactly match the accompanying requisition, triggers sample rejection before testing begins.
"Labeling is the first act of sample management. Automating pre-analytical barcode application reduces human error and supports analysis-ready datasets for downstream AI processing."
For clinical trial teams, the stakes are higher still. A rejected specimen at a multi-site study means a missed time point, a protocol deviation, and a query that can delay database lock by days. Getting labeling right from the start is not a back-office detail. It is the first data quality gate in your entire trial workflow.
Key Takeaways
Compliant sample labeling requires two patient identifiers, a machine-readable barcode, and exact requisition matching, validated through documented LIMS and printer testing before any specimen enters the workflow.
| Point | Details |
|---|---|
| Two identifiers are mandatory | Full name plus MRN or DOB on every label; missing either triggers rejection under CLSI PRE01 and institutional policy. |
| Machine-readable IDs reduce errors | Barcode or Data Matrix automation at print time removes transcription mistakes and supports AI-ready data pipelines. |
| Validation must be documented | Printer, scanner, and LIMS integration tests require pass/fail records kept in the QMS for CLIA and CAP inspections. |
| Rejection workflow belongs in the SOP | Quarantine, notify, document, and define recollection criteria before a mislabeled specimen reaches the analyzer. |
| Kohealth Labs integrates the full workflow | Single-contract lab and radiology services with AI-driven mismatch flagging reduce relabel cycles and speed trial data delivery. |
Which U.S. standards govern sample labeling?
The U.S. regulatory landscape for sample labeling spans FDA, CLSI, CAP, and OSHA, and each framework addresses a different slice of the problem. Labs writing SOPs typically need to reference more than one.
- CLSI PRE01 is the harmonizing standard for patient and specimen identification across blood and nonblood specimens. It covers collection, transport, handling, and the field-level requirements labs use to build SOPs and training programs.
- CLIA and CAP inspections evaluate label-to-record concordance directly. Inspectors check whether the label fields match the LIS order and whether the lab can demonstrate a documented rejection workflow when they do not.
- FDA 21 CFR Part 58 (GLP) and 21 CFR Part 312 (IND studies) require traceability from collection through analysis for study specimens, making accession-level chain-of-custody a regulatory obligation, not just a best practice.
- OSHA HazCom (29 CFR 1910.1200) and the Bloodborne Pathogens Standard (29 CFR 1910.1030) require hazard communication labels on containers holding infectious or hazardous materials, including biohazard symbols and appropriate handling warnings.
What fields must every specimen label include?
OHSU's specimen-labeling policy requires full patient name plus MRN or date of birth, plus collection date and time. Samples not meeting those requirements will not be tested. That policy reflects the two-identifier rule embedded in CLSI PRE01 and enforced by CAP checklists nationwide.
Minimum required fields (primary label):
- Two patient identifiers: full legal name AND one of MRN, date of birth, or other unique ID assigned by the institution
- Accession number or sample ID (LIS-generated, machine-readable)
- Collection date and time (24-hour format preferred for clinical trials)
- Specimen type and source (e.g., "Serum, venipuncture, right antecubital")
- Collector ID or initials where required by protocol or transfusion policy
Recommended additional fields for clinical trials and biobanking:
- Study ID and protocol number
- Visit number and time point
- Aliquot ID and position (for biobank tubes)
- Storage temperature requirement (e.g., "Store at −80°C")
- Handling flags using short codes: "BIOHAZ," "FROZEN," "LIGHT SENSITIVE"
- Chain-of-custody signature line for transfusion specimens
HIPAA and confidentiality on the label: Use short coded identifiers (subject ID, MRN) rather than full diagnosis or treatment information. Labels traveling outside the facility should carry the minimum identifiers needed to match the specimen to its record, nothing more.
How do barcodes reduce labeling errors in practice?
1D barcodes (Code 128, Code 39) dominate clinical labs for accession numbers because virtually every analyzer and LIS scanner supports them. 2D Data Matrix or QR codes are the right choice for small-diameter cryovials or when you need to encode multiple metadata fields (study ID, visit, aliquot) in a compact footprint.
Automating barcode application at the point of label printing, rather than hand-writing or manually entering IDs, removes the single largest source of pre-analytical error: transcription mistakes. Consistent, machine-readable metadata also maps cleanly to downstream analyzers and AI-ready data pipelines, cutting the time from collection to a verified, analysis-ready result.
Controls and testing before rollout:
- Print quality verification: run ISO/IEC 15415 or 15416 grade checks on every new label stock and printer combination
- Scanner compatibility matrix: test each barcode symbology against every reader in the workflow (accessioning, analyzer, courier handheld)
- Acceptance criteria: define a minimum read rate (commonly 99% or higher) before approving a printer/stock combination for production
- Periodic revalidation: rerun print quality checks after firmware updates, printer head replacements, or label stock changes
Pro Tip: Run a 50-label pilot print on the actual tube type before full rollout. Curved surfaces, condensation from refrigeration, and centrifuge forces all degrade adhesion and scan quality in ways a flat-surface test will not catch.
Which label materials survive freezing, transport, and analyzers?
Material choice is where many labs lose compliance gains made at the SOP level. A perfectly formatted label that peels off a cryovial at −80°C is useless.
- Cryovials and frozen specimens: Use solvent-resistant, freezer-grade polyester or polypropylene label stock with a permanent cryogenic adhesive. Standard paper labels fail below −20°C.
- Histology slides: Smear-resistant, xylene-resistant slide labels are required. Thermal-transfer printing holds up to processing solvents; direct-thermal prints do not.
- Thermal-transfer vs. direct-thermal: Thermal-transfer uses a ribbon to bond ink to the substrate, producing a durable, chemical-resistant print. Direct-thermal is lower cost but fades with heat, light, and chemical exposure, making it unsuitable for long-term storage or specimens exposed to sunlight during transport.
- Adhesive guidance: Permanent adhesives for any specimen held longer than 24 hours or transported externally. Repositionable adhesives are appropriate only for short-term in-lab use.
- Placement rules: CLSI guidance specifies that labels must not cover fill lines, tube graduations, or manufacturer markings. On secondary containers and transport boxes, place the label on the side, not the lid, so it remains readable when containers are stacked.
How do you write SOPs and define acceptance criteria?
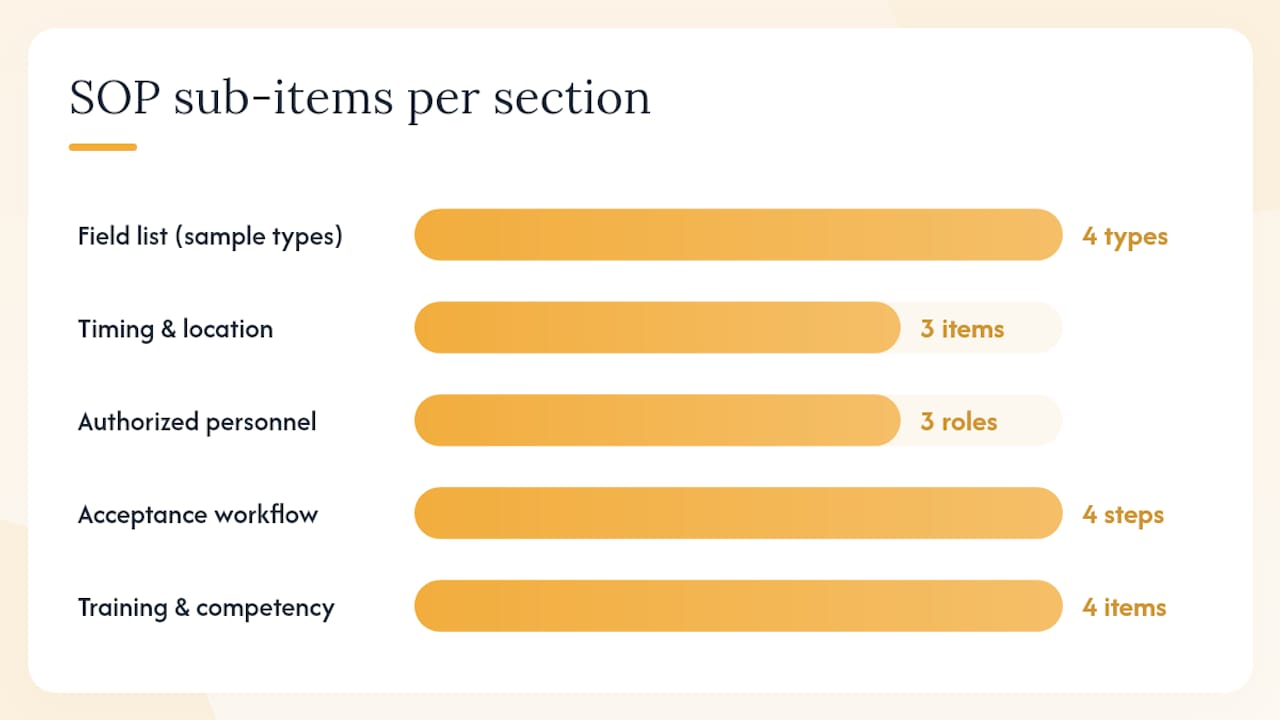
A defensible SOP covers four things: the minimum label fields per sample category, who applies the label and when, what constitutes a nonconforming label, and what happens next when one is found.
SOP components to include:
- Field list by sample type (routine, transfusion, GLP study, biobank)
- Timing and location of label application (at bedside before draw, at the collection station, never retrospectively)
- Authorized personnel (phlebotomist, nurse, study coordinator per protocol)
- Two-identifier verification step before the specimen leaves the collection area
Acceptance and rejection workflow:
The Colorado Department of Public Health and Environment requires at least two identifiers and will not process samples with missing or mismatched information. When a mismatch is found, the lab notifies the sender by secure communication so the record can be corrected before processing. Your SOP should mirror that workflow: quarantine the specimen, notify the ordering provider or study coordinator, document the event in the LIS, and define whether recollection is required or whether a witnessed correction is permissible.
Training and competency:
- Initial competency check before independent labeling
- Annual retraining with documented sign-off
- Error trending: track rejection reasons monthly and feed results back to phlebotomy and nursing leadership
- CAP/CLIA evidence: keep training records, competency assessments, and rejection logs accessible for inspectors
Pro Tip: Build a short "label audit" into your morning accessioning routine. A five-minute scan of the prior shift's rejection log catches systemic errors (a printer misconfigured overnight, a new hire applying labels before draw) before they accumulate into a protocol deviation.
What does LIMS and EMR integration validation require?
Label printing is only as reliable as the data flowing from the LIS or EMR into the printer. Validation must confirm that what the system sends is exactly what the label prints and what the scanner reads back.
Integration controls:
- Confirm that accession numbers, patient identifiers, and test orders sync correctly between the EMR/LIS and label printer before any specimen is collected
- Define whether the workflow is one-way (LIS pushes to printer) or two-way (scanner confirms receipt back to LIS) and document the confirmation logic
Validation checklist:
- Printer-to-LIS print fidelity: verify every mapped field prints in the correct position and font size
- Scanner read rate by tube type: test each container format (vacutainer, microcontainer, cryovial, slide) independently
- Truncation and field-mapping tests: use the longest patient name in your test dataset to confirm no field is cut off
- Audit trail: confirm the LIS logs print events, reprint requests, and scan confirmations with timestamps
| Validation Test | Pass Criteria | Frequency |
|---|---|---|
| Print fidelity (all fields) | All fields present, correct, legible | Pre-go-live; after any software change |
| Barcode scan rate | 99% or higher per tube type | Pre-go-live; after hardware or stock change |
| Truncation test (max name length) | No field truncated or overlapping | Pre-go-live |
| Audit trail completeness | All print and scan events logged with timestamp | Pre-go-live; annual review |
Recordkeeping for inspections: Keep validation protocols, test results, and change-control records in your QMS. CLIA and CAP inspectors may request evidence that the current label configuration was formally validated and that any subsequent changes went through a documented change-control process.
What do label templates look like for clinical trials and biobanking?
Adapting a generic label template to a specific use case prevents the most common trial-site labeling failures: missing study fields, illegible font sizes on small tubes, and handling flags buried in fine print.
Routine clinical tube (minimum): Full name | DOB | MRN | Accession # (barcode) | Specimen type | Collection date/time | Collector ID
GLP or IND study specimen: Subject ID | Study # | Protocol version | Visit # | Collection date/time | Specimen type | Accession # (barcode) | Storage temp | Handling flag
Transfusion blood tube: Full name | MRN | DOB | ABO/Rh (if pre-printed) | Collection date/time | Collector signature line | Accession # (barcode)
Biobank cryovial (small footprint, 2D Data Matrix preferred): Subject ID | Aliquot ID | Study # | Visit # | Collection date | Storage temp (−80°C) | 2D barcode encoding all fields
For multi-site trials, CLSI PRE01 transport packaging guidance applies to secondary containers. Place a duplicate label inside the transport box in case the outer label is damaged in transit. Study-specific fields (study ID, visit number) belong on the primary label, not only in the requisition, so they travel with the specimen through every handoff.
Implementation checklist for lab managers and site leads
Rollout steps (in order):
- Define minimum label fields for each sample type in your facility and document them in the SOP
- Audit current label templates against CLSI PRE01 and your institutional policy; close any gaps
- Select and procure label stock and printers appropriate for your container types (see materials section above)
- Run a 30-day pilot at one site or one collection station before facility-wide deployment
- Complete printer, scanner, and LIMS/EMR validation with documented pass/fail results
- Train all phlebotomists, nurses, and study coordinators; document competency before independent labeling
- Implement an acceptance log at accessioning to capture every rejection event with reason code
KPIs to monitor:
- Sample rejection rate (target: below 1% for routine; near zero for clinical trial specimens)
- Barcode read rate at accessioning (target: 99% or higher)
- Time from collection to accessioning (baseline, then track improvement)
- Requisition-to-label mismatch count per month
Contingency for mislabeled or lost samples:
- Quarantine the specimen immediately; do not process
- Notify the ordering provider, study coordinator, or sponsor/PI within the timeframe defined in your SOP
- Document the event in the LIS with date, time, and corrective action taken
- Determine whether a witnessed correction is permissible under your protocol or whether recollection is required
- For multi-site trials, escalate to the sponsor's data management team if the event may constitute a protocol deviation
How integrated diagnostics improves labeling accuracy and trial speed
Every handoff between a lab vendor, a radiology provider, and a data management team is a point where label and requisition records can diverge. Integrating lab, radiology, and data delivery under a single workflow reduces those handoffs and the mismatch events that come with them.
When specimen metadata flows from a single LIS through to both laboratory and imaging workflows, the accession number and patient identifiers stay consistent across every result. AI-driven checks at accessioning can flag mismatches between the label and the electronic order before any test runs, creating a documented correction record that satisfies auditors without requiring manual query resolution later.
Pro Tip: Require your diagnostics provider to deliver a mismatch flag report at accessioning, not just at result delivery. Catching a label error before the specimen enters the analyzer saves the cost of a rerun and keeps the audit trail clean.
The labeling changes that deliver the fastest compliance returns
The labs that close the most compliance gaps in the shortest time share a consistent pattern: they enforce two-identifier verification first, introduce barcodes for primary IDs second, and then validate printers and scanners with a structured pilot before expanding.
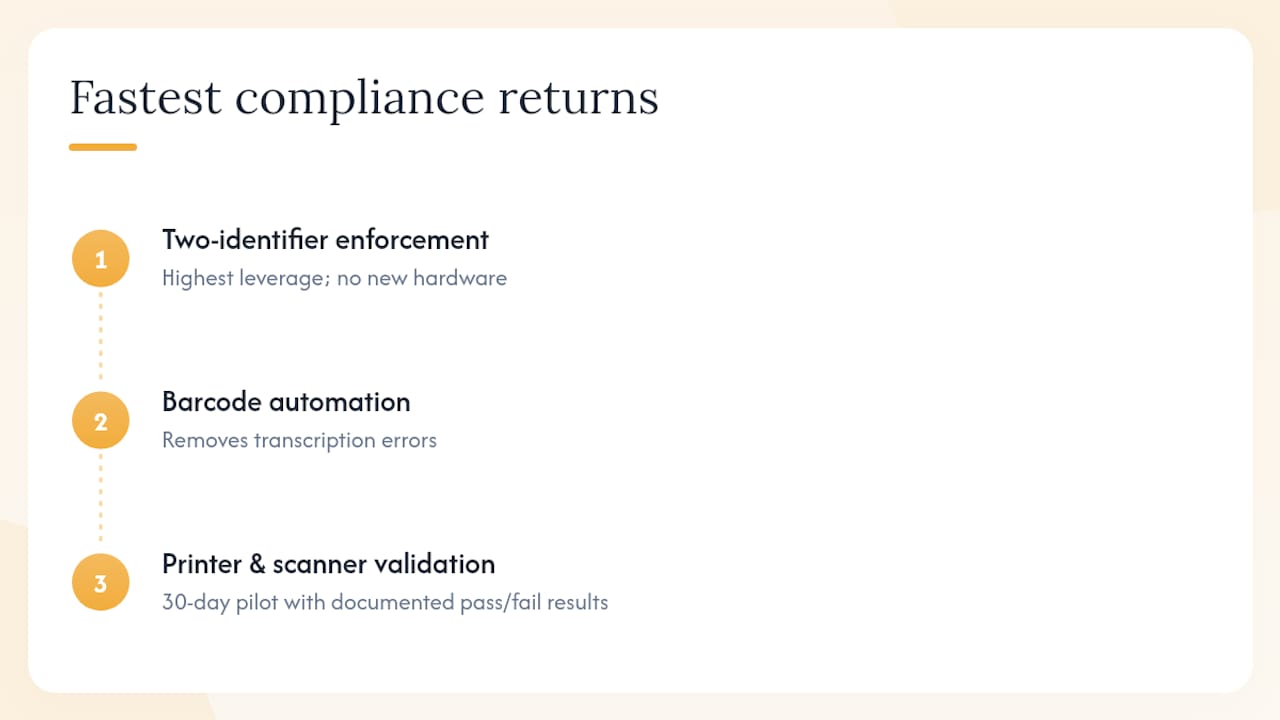
Two-identifier enforcement is the highest-leverage starting point because it addresses the most common rejection trigger without requiring new hardware or software. Once that is in place, barcode automation removes the transcription errors that two-identifier checks alone cannot catch. Printer and scanner validation follows naturally from the hardware procurement step and gives you the documented evidence CLIA and CAP inspectors will ask for.
The balance to maintain is speed versus documentation. A rapid rollout that skips formal validation records may reduce rejections in the short term but creates an inspection liability. A 30-day pilot with documented pass/fail results is a modest investment that protects the entire program.
Kohealth Labs supports validated labeling and integrated data delivery
Kohealth Labs offers clinical trial diagnostic services that include validated label-printing workflows, LIMS integration, courier specimen pickup, and AI-ready data bundles built for CROs and sponsors. Rather than managing separate lab and radiology vendors with separate labeling requirements, you get a single contract, a single accession workflow, and a single data delivery pipeline.
Onboarding includes validation documentation, staff training support, and integrated reporting designed to reduce relabel and reject cycles from day one. The AI-driven data quality layer flags accessioning mismatches before testing begins, so corrections happen at the source rather than in a query log weeks later. To discuss a validated-labeling assessment or a pilot program for your next trial, contact Kohealth Labs at Kohealthlabs.
Sources
Keep copies of the following documents, along with your validation records and label templates, under change control in your QMS. CLIA and CAP inspectors may request any of them.
- Advancing Standards for Specimen Labeling and Tracking | myadlm
- Labeling Requirements | OHSU
- Labeling samples | Colorado Department of Public Health and Environment
- Sample Labeling and Traceability Standards in the U.S. | QIA
This article is general information, not a substitute for advice from a qualified doctor. Consult a qualified healthcare professional about your own circumstances before acting on anything here.